The OCR Document Image Capture SDK is designed to enhance the quality of document photos uploaded by customers to meet OCR recognition requirements.
Usage Instructions
The OCR Document Image Capture SDK is available as open-source software for both iOS and Android platforms. Separate versions for each platform are provided on the official GitHub repository.
Android GitHub Link: https://github.com/trustdecision/TDOcrDocCapture-Android
IOS GitHub Link: https://github.com/trustdecision/TDOcrDocCapture-iOS
OCR Image Specifications and Requirements
| Requirement Category | Specific Standards and Requirements |
|---|---|
| Document Placement | - Ensure that the document is centrally positioned in the image, with all four edges clearly visible and unobstructed. - Maintain the original aspect ratio of the document, avoiding any distortion. - Avoid using non-genuine online samples (e.g., images downloaded from the internet), blurry photos, documents with missing corners, or severely distorted images. |
| Image Quality | - Capture images in a well-lit and evenly lit environment, avoiding strong direct light or shadows. - Use a plain, preferably light-colored background, avoiding complex patterns or textures. - Ensure the image is clear and legible, with no blurriness or overexposure. |
| Image Specifications | - The recommended file size for images is between 100KB and 500KB, balancing quick upload speed and good processing efficiency while avoiding the loss of recognition quality due to excessive compression. - Supported image formats include JPEG, PNG, etc. |
Recommended Examples and Common Errors
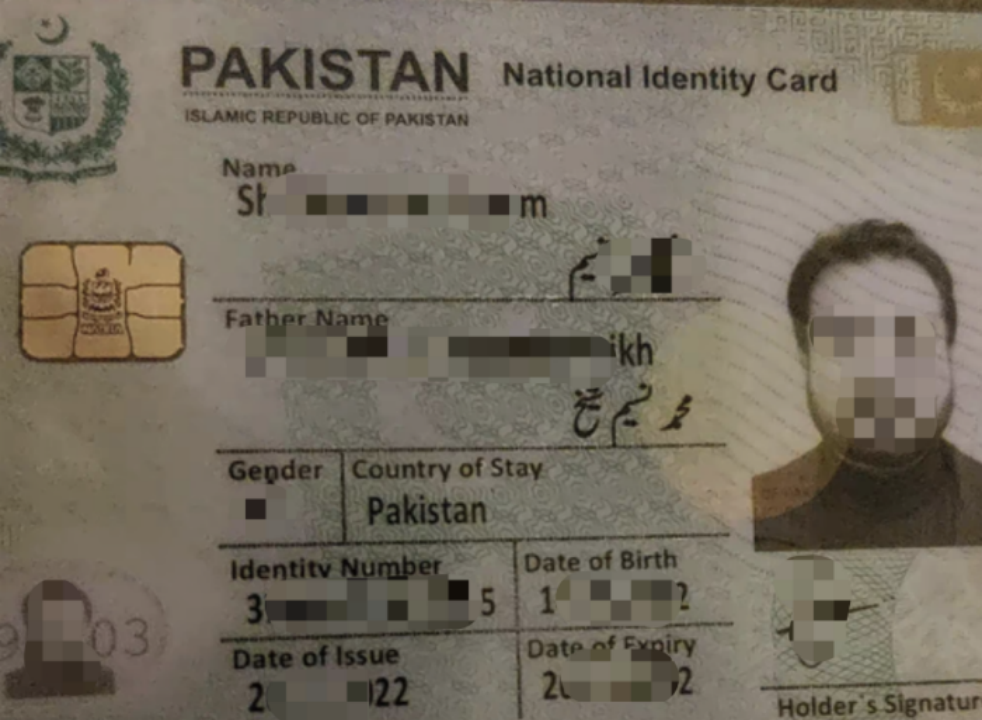
Recommended Document Image Example:
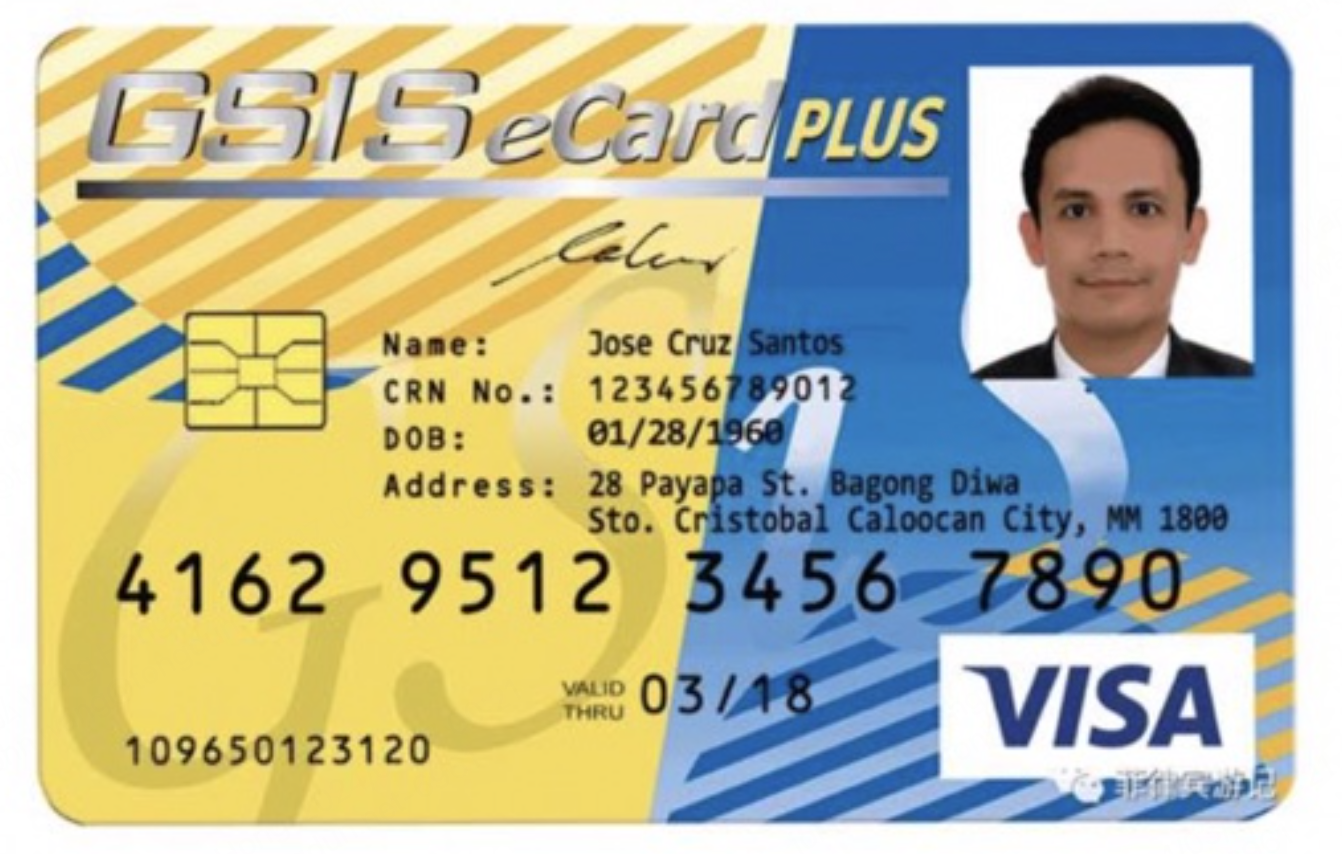
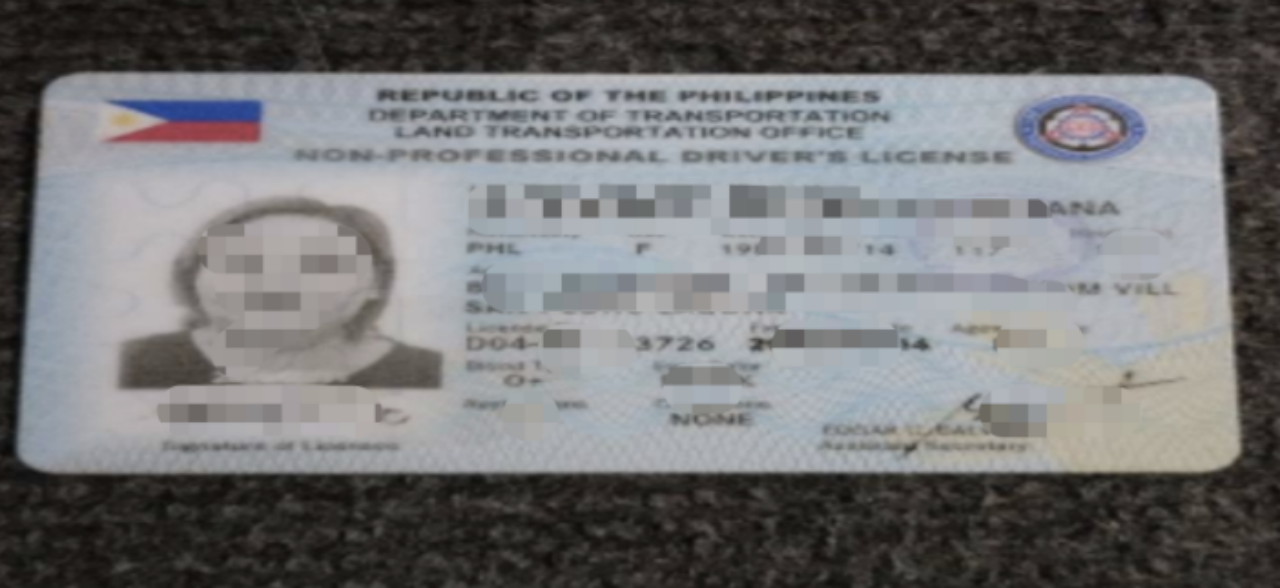
Common Error 1 - Online Non-Authentic Sample (Images Found Online):
Philippine GSIS, a non-standard document. The number of applicants is very limited, and it is only used as a temporary solution before the UMID document is approved. Once UMID is obtained, the GSIS will immediately become invalid.
Common Error 2 - Blurry Document:
Common Error 3 - Incomplete Document Edges:
Common Error 4 - Severely Distorted Aspect Ratio:
OCR Document Image Capture Guidance Pages
Portrait Orientation Capture Page
Depending on your needs, the choice between portrait and landscape capture pages can be made.
Page Key Points:
- Virtual Document Frame: A virtual document frame is displayed in the center of the page, prompting the user to place the document within the frame. The virtual frame should be set at a certain distance from the edges of the phone screen to ensure the document's edges are captured. The size and position of the virtual frame can be edited, with a recommended size of 360px*240px.
- Text Instructions: Include written instructions to guide customers in placing their document within the frame. The text content and position can be edited, with a recommendation to place it at the top of the screen or above the virtual document frame.
- Bottom Buttons: Include buttons for flashlight (based on different document requirements, decide whether to include this button, as it may not be recommended for documents with glossy surfaces), capture, and exit.
Page Example:
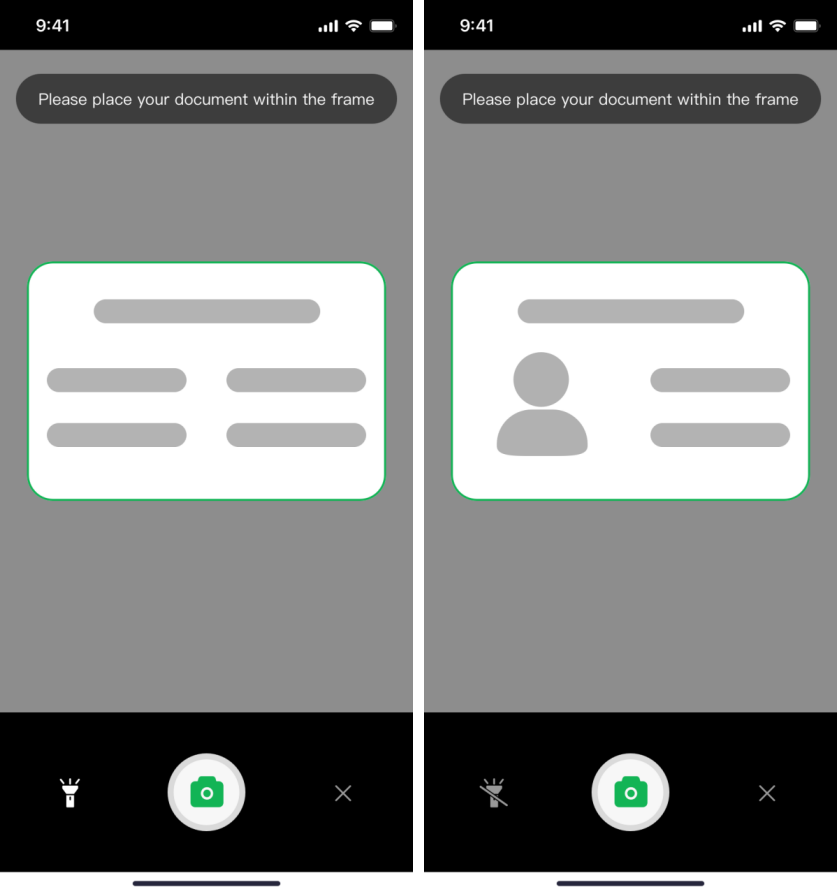
Left: For Documents with Text Only (No Portrait); Right: For Documents with Portrait
Landscape Orientation Capture Page
Depending on your needs, the choice between portrait and landscape capture pages can be made.
Page Key Points:
- Virtual Document Frame: A horizontal virtual document frame is displayed in the center of the screen, prompting users to place their document within the frame. The virtual document frame should be set with some distance from the edges of the phone screen to ensure the document boundaries are captured. The size and position of the virtual document frame can be adjusted as needed, with a recommended size of 450px x 300px.
- Text Instructions: Include written instructions to guide customers in capturing the document in landscape mode and placing it within the frame. The text content and position can be edited, with a recommendation to place it above the virtual document frame.
- Bottom Buttons: Include buttons for flashlight (based on different document requirements, decide whether to include this button, as it may not be recommended for documents with glossy surfaces), capture, and exit.
Page Example:
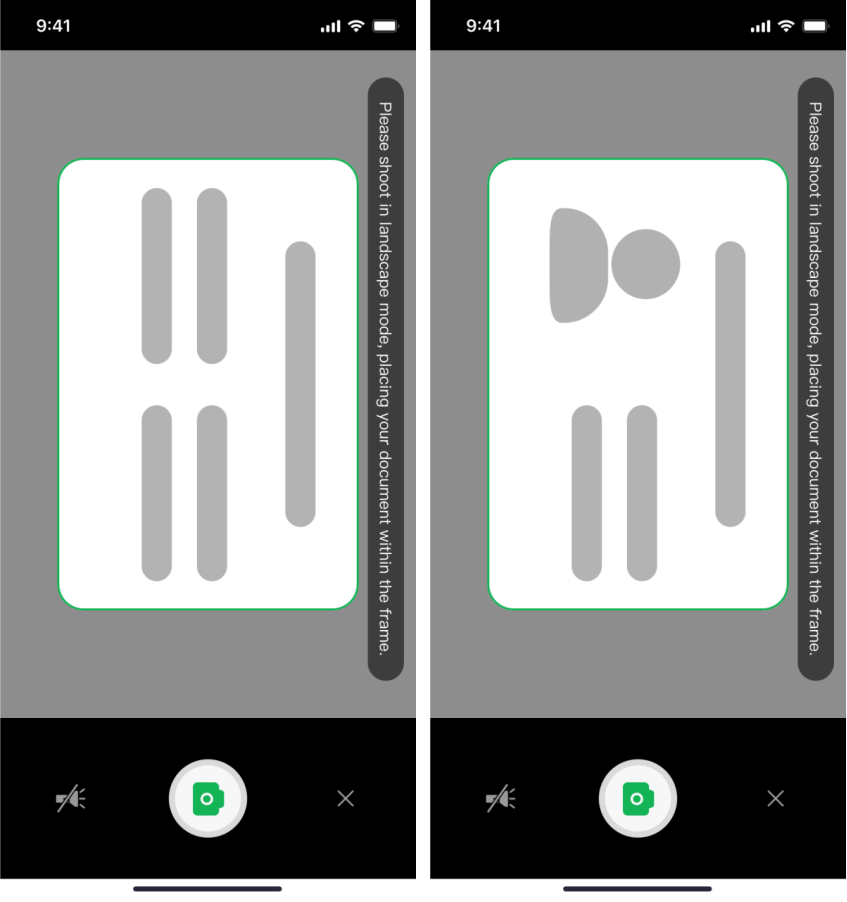
Left: For Documents with Text Only (No Portrait); Right: For Documents with Portrait
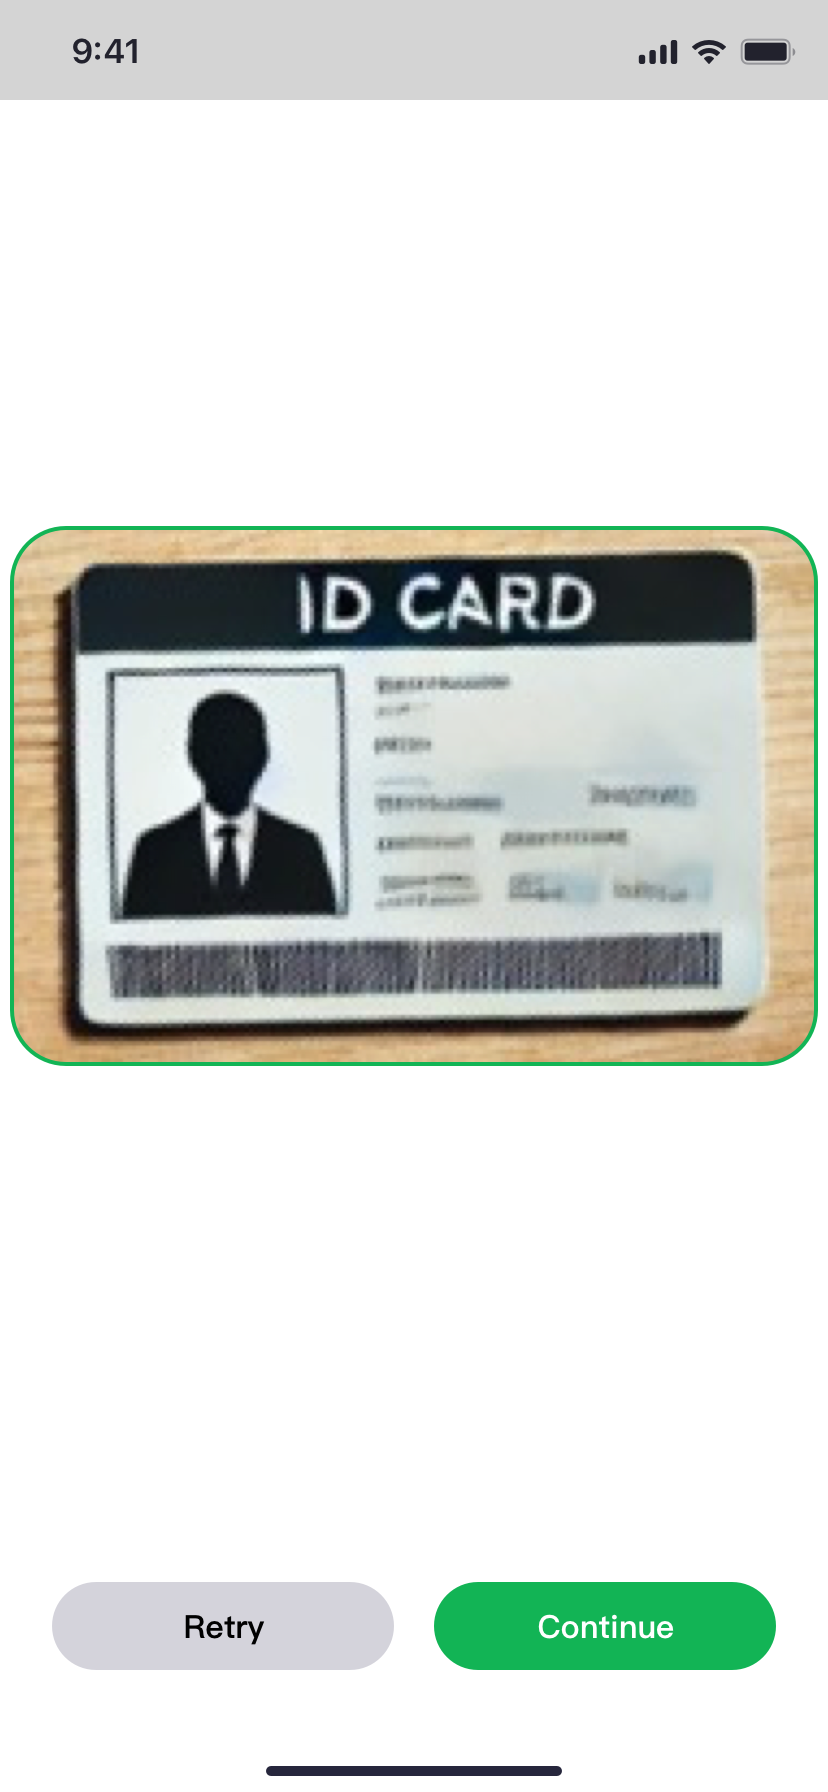
Capture Result Page
Depending on your needs, this page is optional and may not be displayed.
Page Key Points:
- Preview Image of the Captured Result: Display a preview image of the capture result in the center of the page.
- The size and position can be edited as needed, with a recommendation that the preview image of the capture result be 1.2 to 1.3 times larger than the virtual document frame in the first page, with dimensions of 400px x 266px, to ensure the entire document is captured without missing edges.
- If the captured image is too large, compress the image to an appropriate size.
- Bottom Buttons: Include buttons for retake (to retake the photo if necessary) and continue (to confirm and submit the photo).
Page Example: